
Back in FileMaker 16, FileMaker gained the ability to authenticate against OAuth external identity providers Microsoft Azure AD, Google, and Amazon, but only Microsoft supports group-based authentication. That means that the Google and Amazon integrations still require you to configure each individual user in Manage Security, which might mean adding the users in multiple files, and this cannot be automated with FileMaker scripting. Yuck!
In 2019, Wim Decorte and Steven H. Blackwell started publishing a series of white papers about how to integrate with other identity providers (such as Ping, Okta, Auth0, OneLogin, Apple, etc.). This involves repurposing the Microsoft configuration by editing the dbs_config.xml file on the server. You can find the series at https://fmforums.com/files/category/4-white-papers/
Recently, Duncan Baker from Sounds Essential published an 8-part series: Authenticating to FileMaker Server with Keycloak.
Keycloak is an open source identity provider (IdP). It can work as a substitute to other IdPs like Microsoft Azure, Google, and the others already mentioned, but it can also stand in between your application and another IdP to give it additional capabilities.
The Sounds Essential blog series explains from first to finish how to install and configure Keycloak so I won’t be covering that here. Unless you just want to run Keycloak on your Windows machine as an exercise, I recommend to skip part 1 and launch an AWS t4g.small instance with Ubuntu 20.04, then proceed to part 2.
And finally we arrive at our topic for today – configuring Keycloak to add group-based authentication to Google! This should be of interest to any company that uses FileMaker and Google Workspace.
Advantages
- Users authenticate to your FileMaker app using their existing Google credentials.
- 2-factor authentication, if configured in Google, will be enforced for FileMaker logins.
- Single place to manage users and group assignments. No modifications are necessary in FileMaker files to add, remove, or edit users.
- Optional REST API to automate user management.
Before we start, you should work through parts 2 through 6 of the Sounds Essential blog series and you should have a working configuration that allows you to login to a FileMaker database with a Keycloak account.
Configure an external identity provider in Keycloak
Navigate to the correct realm (usually not the Master realm), then click “Identity Providers”, then “Add provider…” and select “Google”.
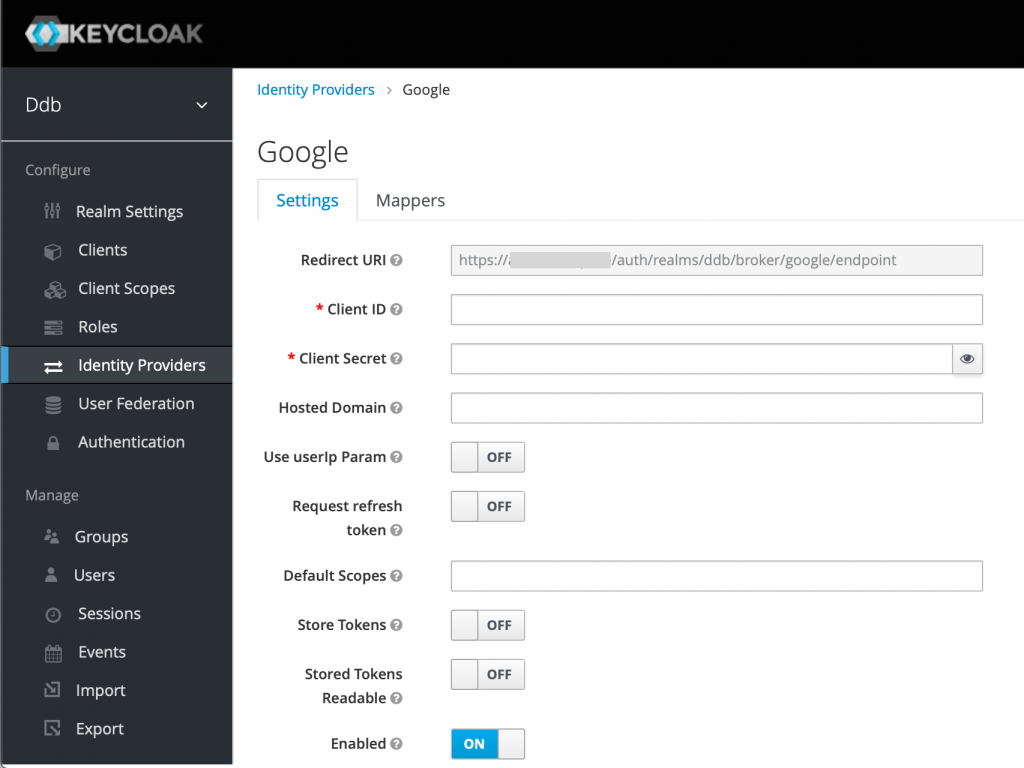
Take note of the Redirect URI. We’ll need it in a moment…
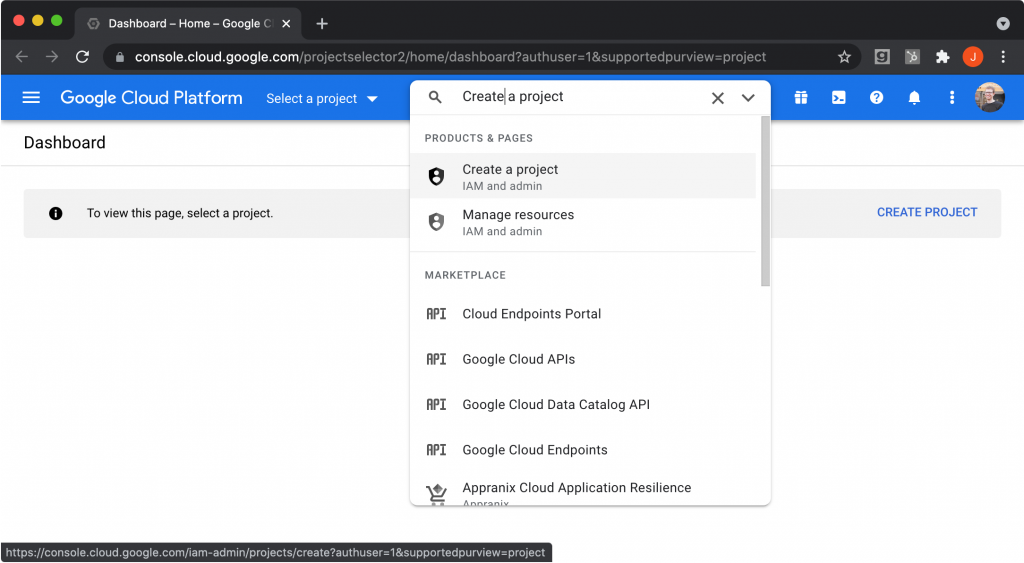
In a new window, login to the Google developer console at https://console.developers.google.com and login. You should be an administrator within your organization.
In the search bar, type “Create a project” and select “Create a project”.
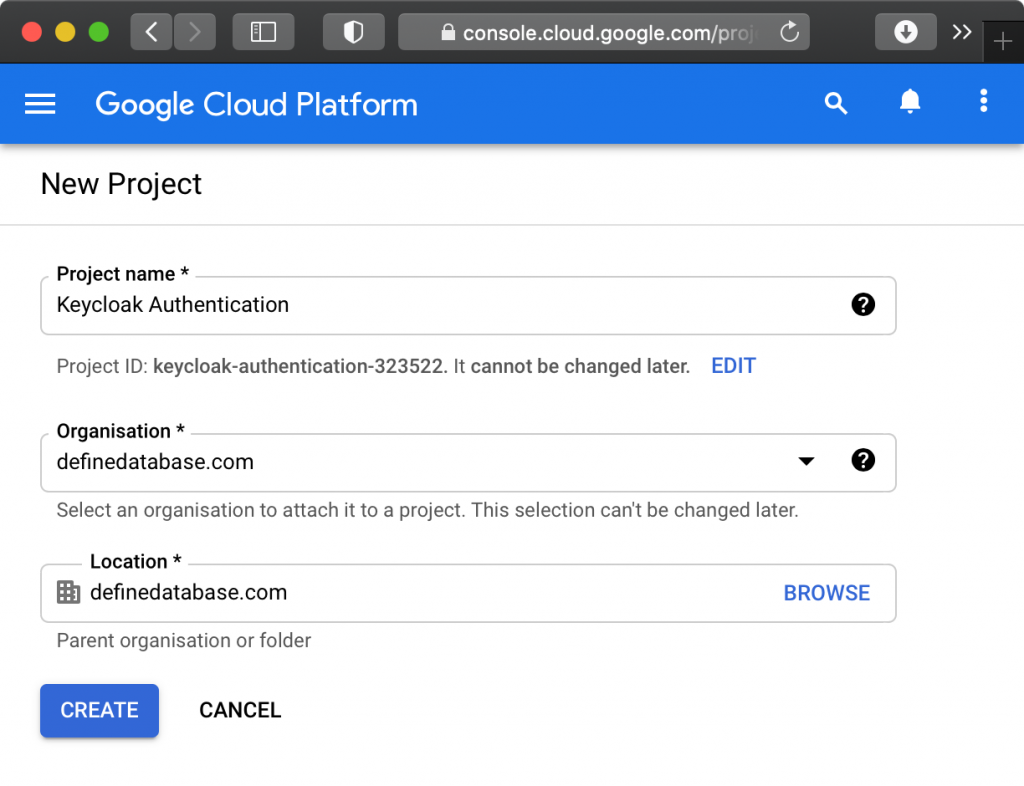
Provide a project name like “Keycloak Authentication”, then select your organization and click “Create”.
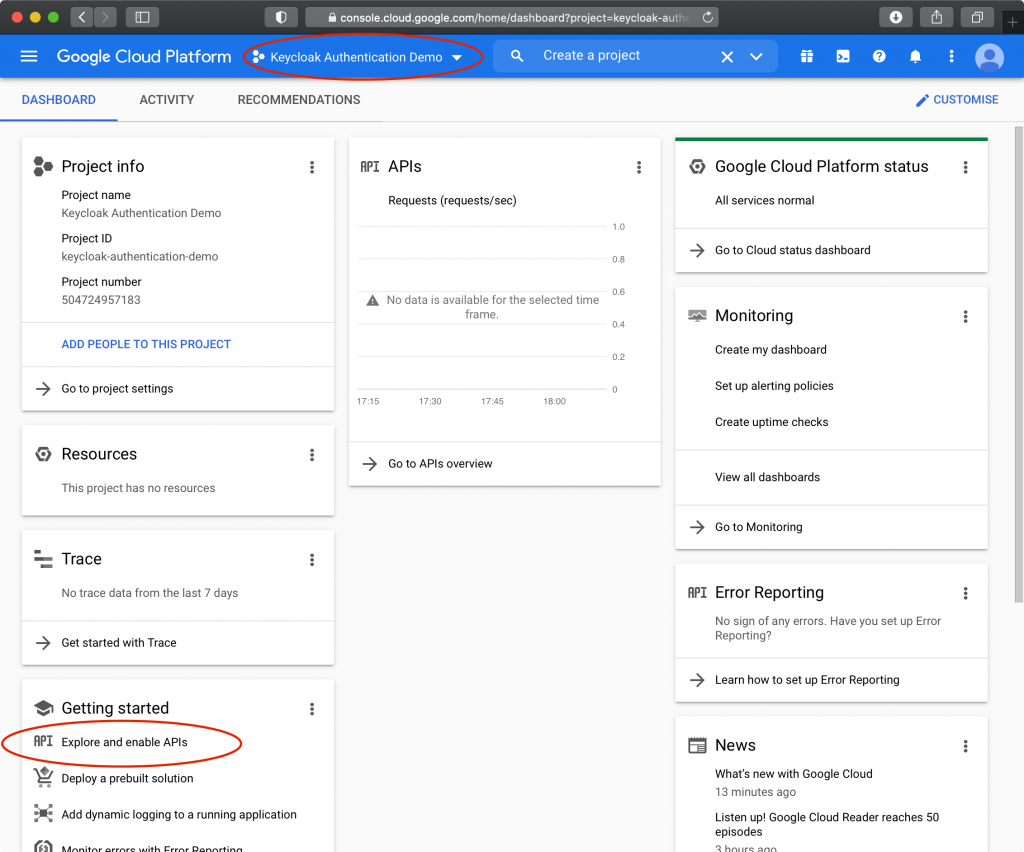
If this is not your first project, you may need to click “SELECT PROJECT”. Make sure your project name appears at the top of the screen.
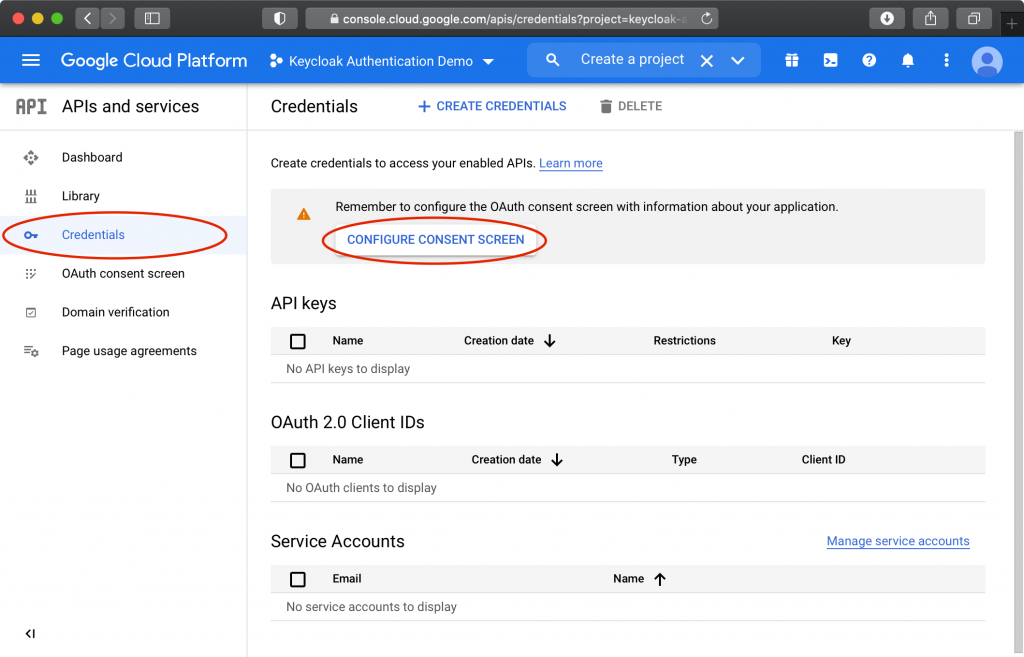
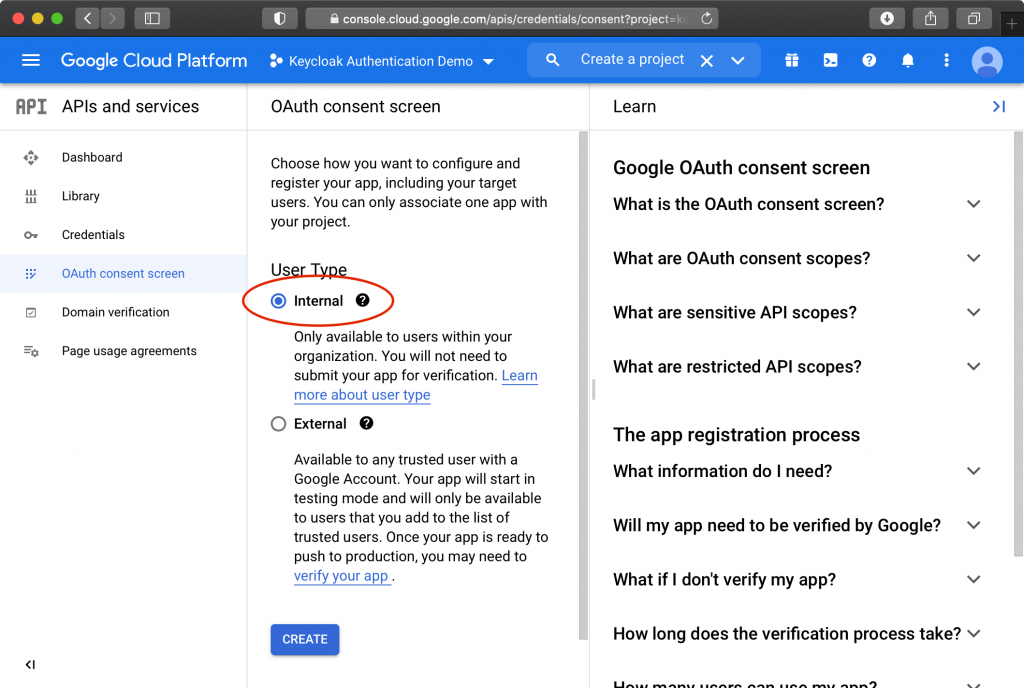
Click “Explore and enable APIs”, then click “Credentials”, then “Configure Consent Screen”, then “Internal”, and finally “Create”.
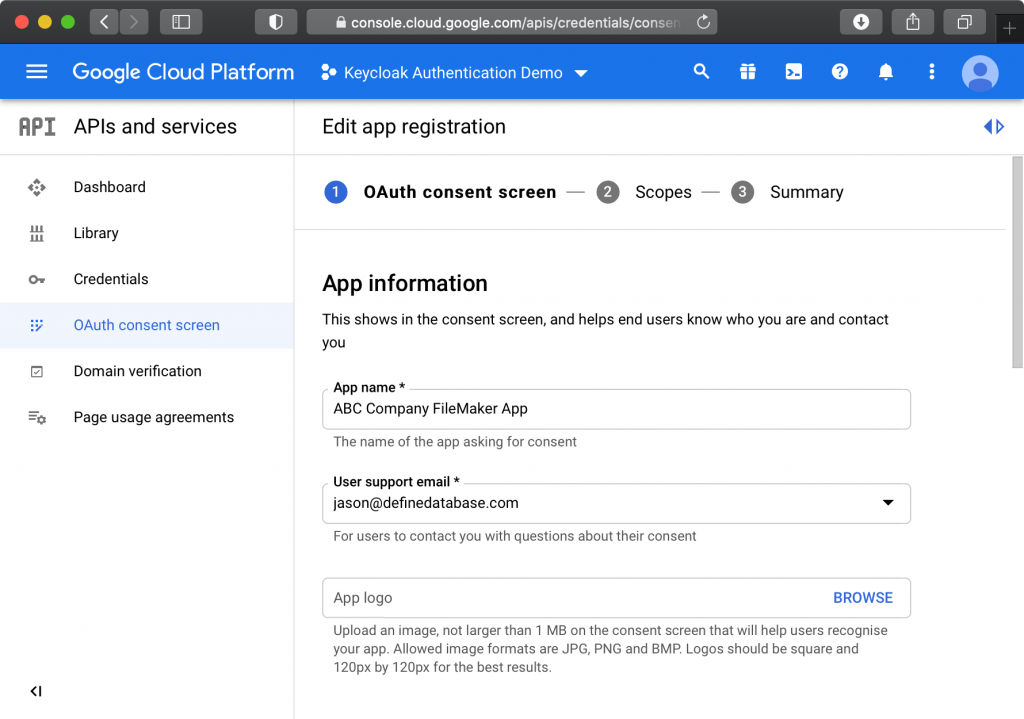
Provide an app name like “ABC Company FileMaker App” and select a user support email. Upload a logo if you wish – this will appear on the login screen.
For “Authorized Domains”, add the domain of your Keycloak server. It is not necessary to include the subdomain, so if your keycloak server responds to auth.mydomain.com, you should enter mydomain.com
Complete the “Developer Contact Information”, then click “Save and Continue”, and then “Save and Continue” again.
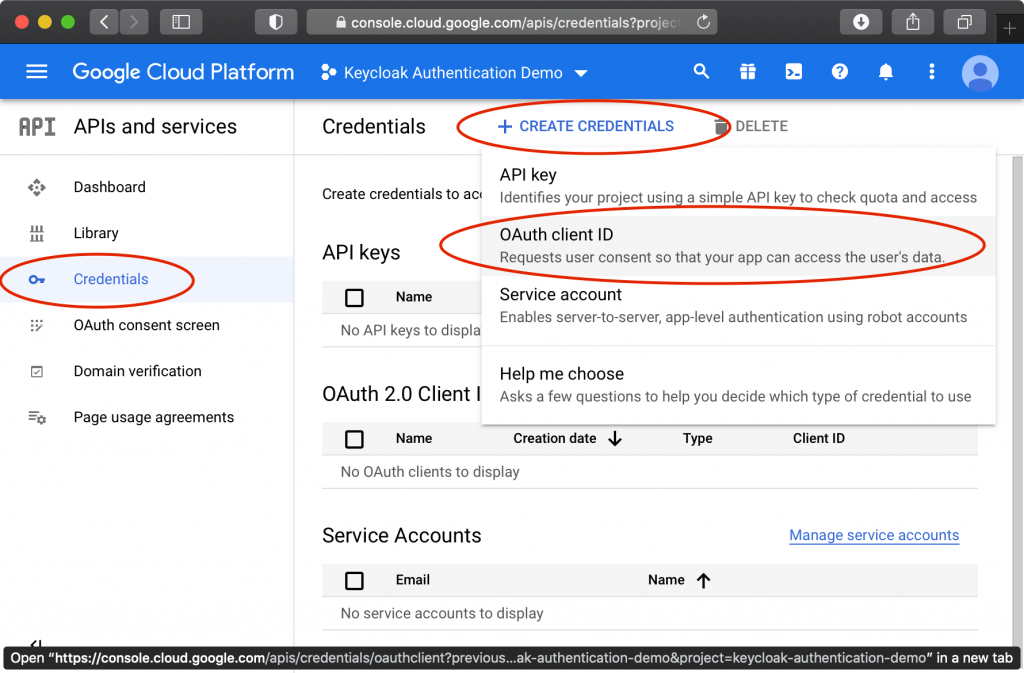
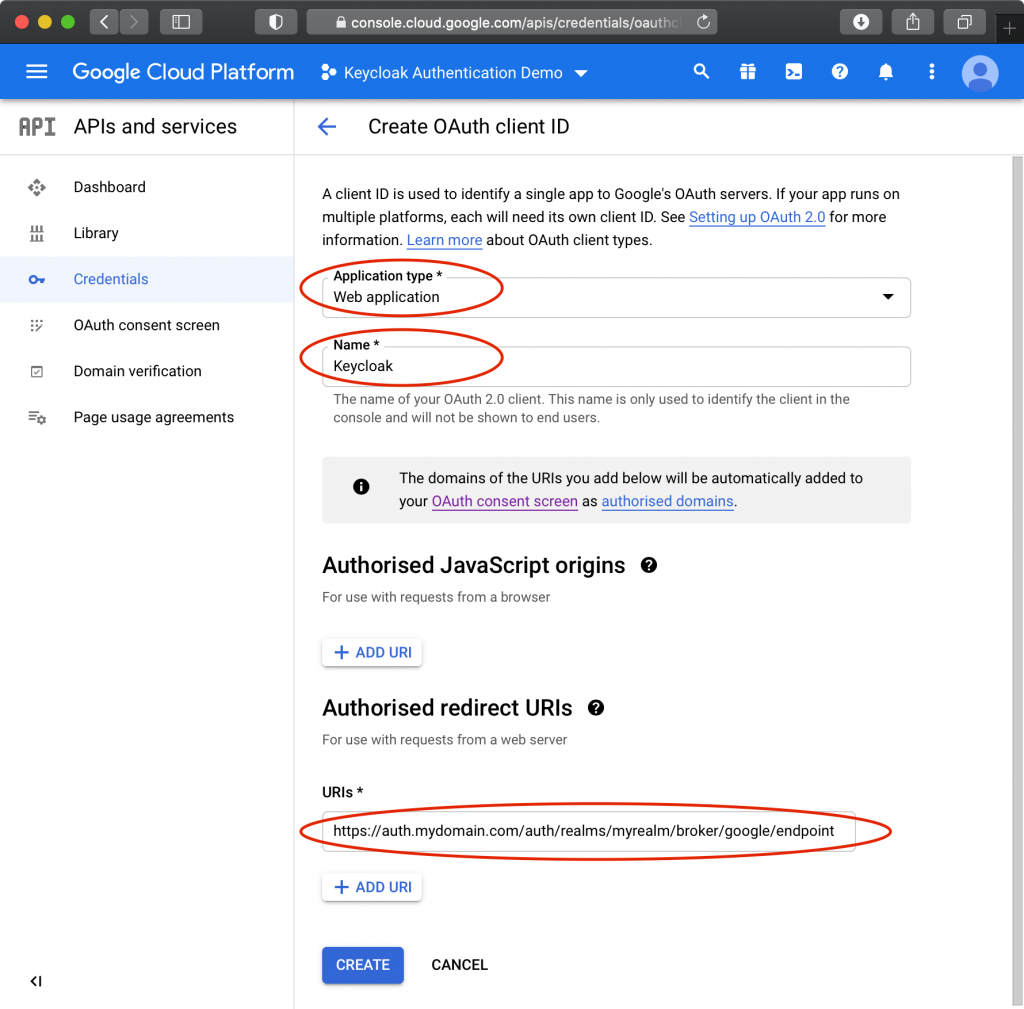
Click “Credentials” in the left menu, then “Create Credentials”, then “OAuth client ID”, then select “Web Application”, and provide a name like “Keycloak”.
Under “Authorized redirect URIs”, click “ADD URI”, and paste the redirect URI from Keycloak, then click “Create”. It should look something like https://auth.mydomain.com/auth/realms/myrealm/broker/google/endpoint
You should now see the Client ID and Client Secret. Return to the Keycloak window and add the Client ID and Client Secret, then enable “Trust Email”. Save changes.


If we create a user first in Keycloak and then the user logs in via Google with a matching email address, Keycloak by default will ask the user if they want to merge the accounts. This is unnecessary (we always want the accounts to merge), so let’s remove that step from the flow.
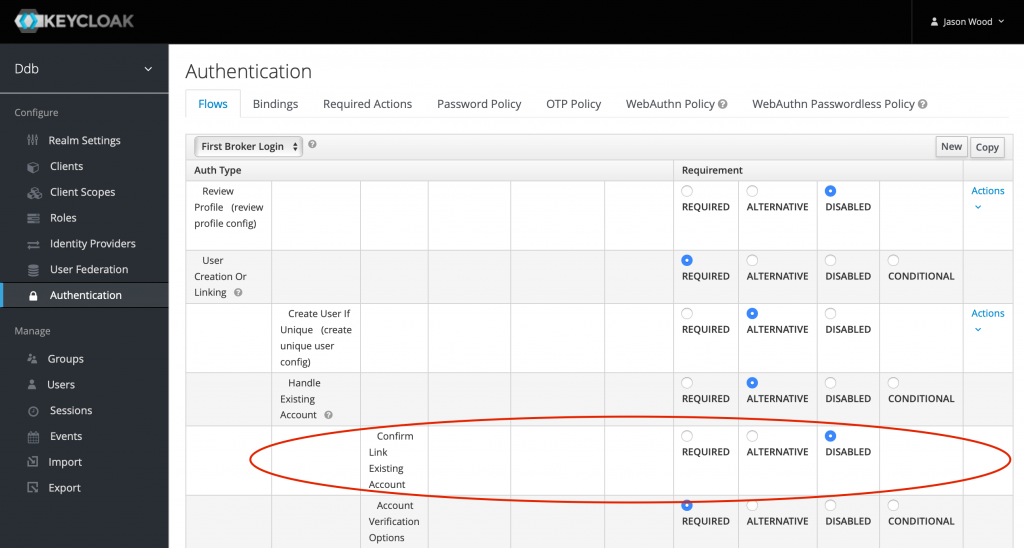
Link accounts automatically without confirmation
Click “Authentication” in the left menu. Under “Flows” select “First Broker Login”. Look for “Confirm Link Existing Account” and set it to “DISABLED”.
At this point, the user has to click 2 buttons before they can authenticate. First they click the “Keycloak” button (or whatever you named it in dbs_config.xml) in the FileMaker login dialog, then they have to click the “Google” button in the Keycloak login dialog. If you never want users to login using native Keycloak credentials, then this step is unnecessary and you can remove it…
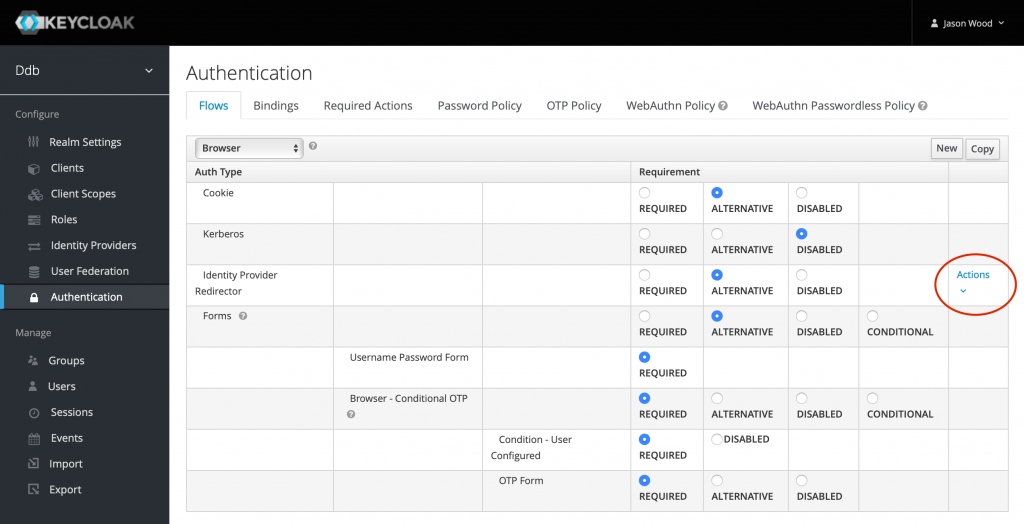
Removing the Keycloak login screen and go directly to Google
Click “Authentication” in the left menu. Under “Flows, select “Browser”. Find “Identity Provider Redirector” and select Actions > Config. You can set the “alias” to something like “Go directly to Google”. Set the “Default Identity Provider” to “google” (lower case), and click “Save”. The Keycloak login is now bypassed.
This is similar to the new feature in FileMaker 19, “Show sign-in fields even when OAuth or AD FS is enabled”. This option in “File Options” is disabled by default, meaning that you probably already see a simplified login screen with only the option to login via Keycloak. This helps to avoid confusion where users think they can input their credentials into the native login fields. A user (normally an administrator) can open the full login dialog by holding Option (Mac) or Shift (Windows).
This feature does not work in WebDirect, where the login fields are always displayed. If you would like to hide the native login fields, read on…
Hiding the native login fields in WebDirect
UPDATE (2022-02-28): In FileMaker Server 19.4.1 and later, the “Show sign-in fields even when OAuth or AD FS is enabled” feature has been extended to WebDirect, so these steps are no longer necessary.
You will need to edit 2 files, styles-desktop.css and styles-mobile.css, which are located in the FileMaker Server folder under…
Web Publishing/publishing-engine/jwpc-tomcat/fmi/VAADIN/themes/default/
Add the following to both files:
.fm-native-login-dialog-auth-panel { display: none } #login_dialog_separator { display: none !important } .fm-login-dialog-auth-panel { display: none !important }
If you are making this change on Mac or Windows, you can edit the files through the desktop OS, but if editing on Ubuntu Linux, you’ll probably want to use a command-line editor…
I found that nano and pico were extremely slow with these files, probably due to the lack of line endings (minified css). I solved this by using vim, which requires a little more knowledge…
sudo vim /opt/FileMaker/FileMaker\ Server/Web\ Publishing/publishing-engine/jwpc-tomcat/fmi/VAADIN/themes/default/styles-desktop.css
Use the arrow keys to place the cursor after the comment at the top, then press i to enter INSERT mode and press Return to create a new line. Paste the CSS snippet above. Press Escape to return to command mode and type :wq then Return to save and exit. If you wish to exit without saving, type :q! then Return. Repeat for styles-mobile.css.
Clear your browser cache and refresh the login screen to see the change.
Important! When you upgrade FileMaker Server, these changes will be lost and you will need to repeat these steps.
Closing thoughts
With so many businesses using Google Workspace, the ability to offer group-based authentication for FileMaker with Google accounts is a big win. I hope you will find this information useful. Please comment or reach out with any feedback!
Hi Jason, thanks for this article! Can you clarify the following for me please? So with the setup that you describe in your article, can users be created either in Google Workspaces or in Keycloak, and they are synced to the other system, or do they need to be created in one or the other? Similar question regarding groups, where are the groups and group memberships to be created, in Keycloak or Workspaces?
If the user does not exist in Keycloak and they login via Google, they will be added as a Keycloak user but they won’t have any groups assigned, so they won’t be able to access FileMaker until an admin adds the appropriate group in Keycloak.
If the user is added to Keycloak by an admin and they assign the group, then the account will be ready to use the first time they login.
Note the section titled “Link accounts automatically without confirmation” and the text above it which states “If we create a user first in Keycloak and then the user logs in via Google with a matching email address, Keycloak by default will ask the user if they want to merge the accounts. This is unnecessary (we always want the accounts to merge), so let’s remove that step from the flow.”
If we did not follow the instructions in that section, and an administrator added a user account to keycloak, and then the user authenticated via Google, the user might choose not to link the accounts, in which case we would end up with 2 keycloak users (one authenticated internally and one authenticated via Google), and the Google one would not have any group assignment, so it wouldn’t be able to access FileMaker.
Where you create the account first doesn’t matter, but the Google account has to exist the first time you try to authenticate with it. Without the Google account, you will simply be unable to authenticate via Google. You would still be able to authenticate via your Keycloak account by resetting your keycloak password.
You do the group assignment in Keycloak. The whole reason we’re doing this is because Google’s OAuth implementation doesn’t support group based authentication (at least at the time I posted the blog).
It’s been a while since I’ve done any of this so anything above could be wrong!:-)