
FileMaker Container fields are easy to implement and great for a variety of use-cases, but when used to store large files or large numbers of files, they impose a heavy burden on your FileMaker infrastructure. It can be like a ball and chain attached to your FileMaker database, making it more cumbersome to move data between systems or to manage backups.
There is a better way!
Update: Jason presented this topic at SOFA in January, 2022. The recording is available on at: https://youtu.be/-OcZ_cC6wtc
Object Storage Basics
S3 and similar services are known as “object storage”. Objects are files. Object storage is unlike a drive volume in the sense that your files aren’t guaranteed to be physically stored on a single device, together on the same file system. In fact they’re almost guaranteed to be spread across many devices, perhaps hundreds of metres apart!
All objects are organized into “buckets”, which exist in a “region” (physical location in the world). You can use one or many buckets to organize your objects. You might decide to make one bucket for each distinct FileMaker app you build. Or you might decide to segment your objects further by adding separate buckets for distinct modules within your app, or perhaps a “public” and “private” bucket with different privileges.
Objects have paths that can look like directory structures, but they aren’t real directory structures – the path is really just an extended object name, or “key”. Note: the S3 console will allow you to navigate the hierarchy as if it were a real directory structure.
The Costs
In AWS S3 Standard, you can store files for $0.023US per GB per month in US East. The same amount of storage on a General Purpose EBS volume costs $0.08US (3.5 times more!). More importantly, you never pay for space you don’t use on S3, whereas in EC2, you provision storage in advance and pay for all the space you don’t use, too!
There are additional costs for requests & retrievals, data transfer, etc, and many ways to reduce your costs for infrequently accessed data, but unless you’re storing hundreds of gigabytes of data, you’re probably not going to need to think about this for a while.
Other Advantages
Durability
Any object stored in S3 is automatically replicated across at least 3 “Availability Zones” by the time each transaction completes. This is one reason Amazon can promise “eleven nines durability” (durability of 99.999999999% per year).
If you store ten million objects in S3, you should expect to lose one file every ten thousand years, on average.
Availability Zones are separated by several km (source), but if you’re concerned about large scale disasters, you can configure redundancy across geographic regions also.
Caveat – this type of redundancy doesn’t protect you against accidental deletion. More on that later…
Take a load off
Your FileMaker Server, that is… leave the business of large file transfer, storage, and backups to an external service so your FileMaker Server can focus on the things it does best.
Web Publishing
Need to display an asset in a web interface? No problem! Your FileMaker app can generate a secure “presigned” URL designed to work for seconds or days, so the user’s browser can request the file directly from your S3 bucket. It’s similar to the streaming URL generated in the FileMaker Data API, but more flexible.
Getting Started with AWS and Configuring S3
Sign up for AWS
If you don’t already have an AWS account, go to console.aws.amazon.com and “Create a new AWS account”. It is strongly recommended to add two-factor authentication to this account and protect your credentials carefully.
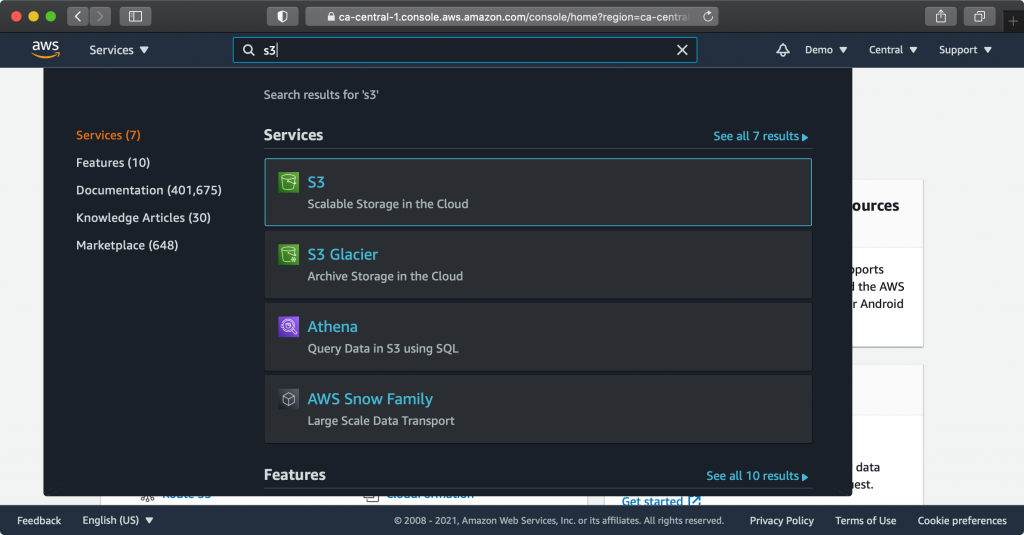
You can quickly navigate to AWS Services by typing the name in the search bar at the top of the screen and selecting the service from the result.
Configure S3
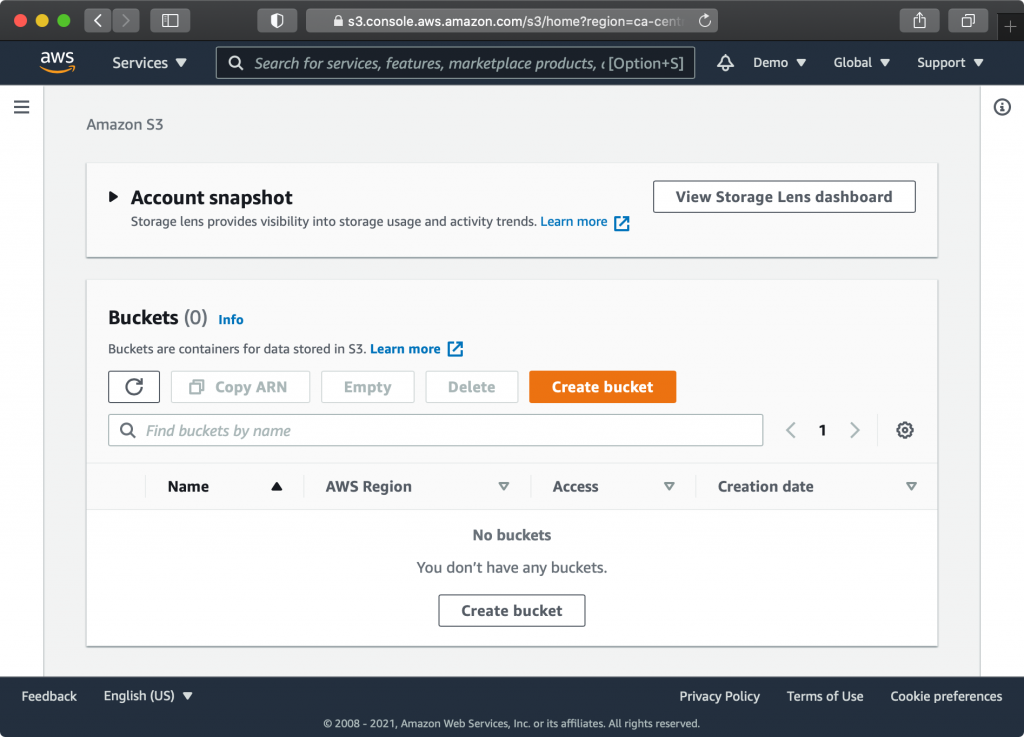
Go to the S3 service
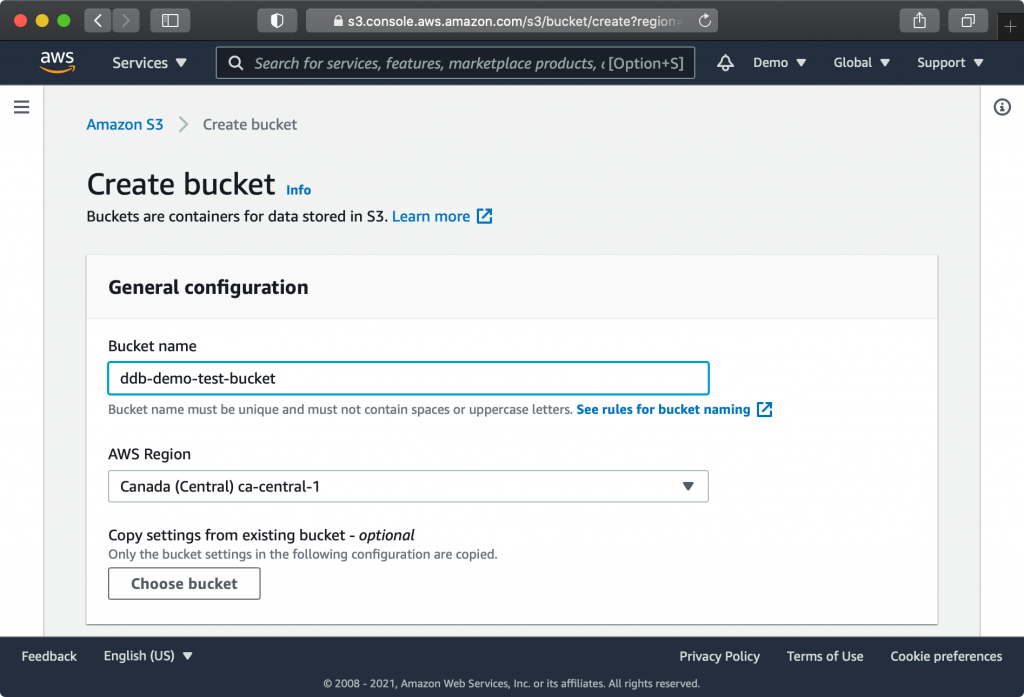
Click “Create bucket”, choose a bucket name, and select an AWS Region near you.
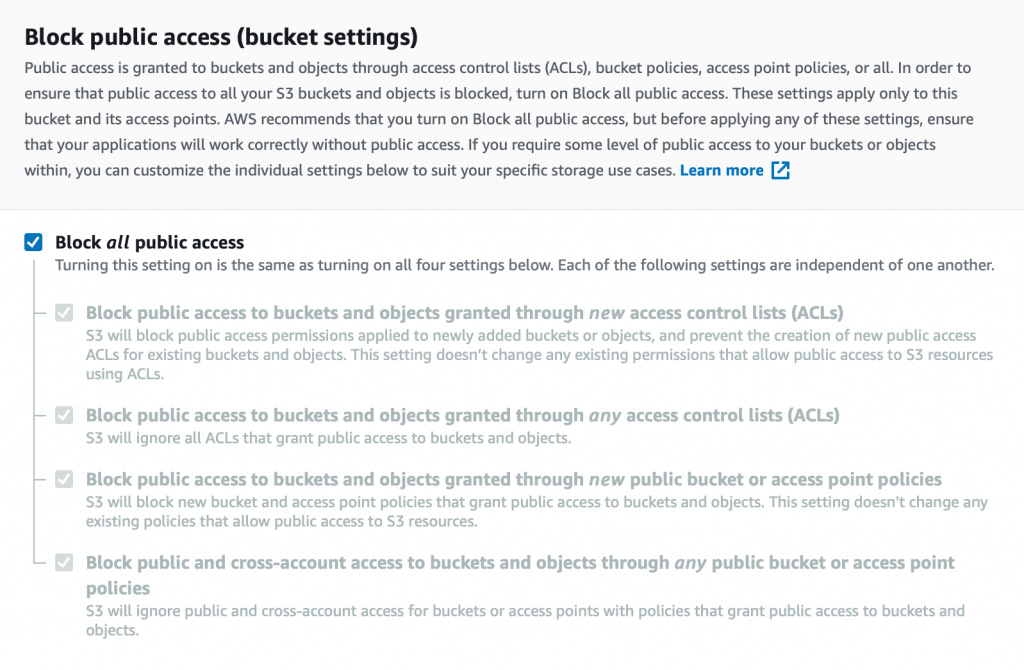
As you scroll down, you will see that by default, “Block all public access” is enabled. Leave this on. With this option enabled, you ensure that no matter what you do on individual objects, you can’t accidentally make anything in your bucket public. Only an AWS identity with privileges to read the bucket can see files in your bucket. While S3 has a highly granular and complex permission structure, most use cases are possible while applying this strict policy.
On this screen you could enable Bucket Versioning if you wish. When Bucket Versioning is on, if you attempt to upload an object to a path (or “key”) that already exists, the existing object will be retained as a “version”. The same happens if you “delete” an object. To really delete an object, you would need to explicitly delete the version or use a lifecycle rule (for example, to automatically delete versions after a certain number of days). Bucket versioning can also be enabled or disabled later.
There are other options on this page that are beyond the scope of this tutorial.
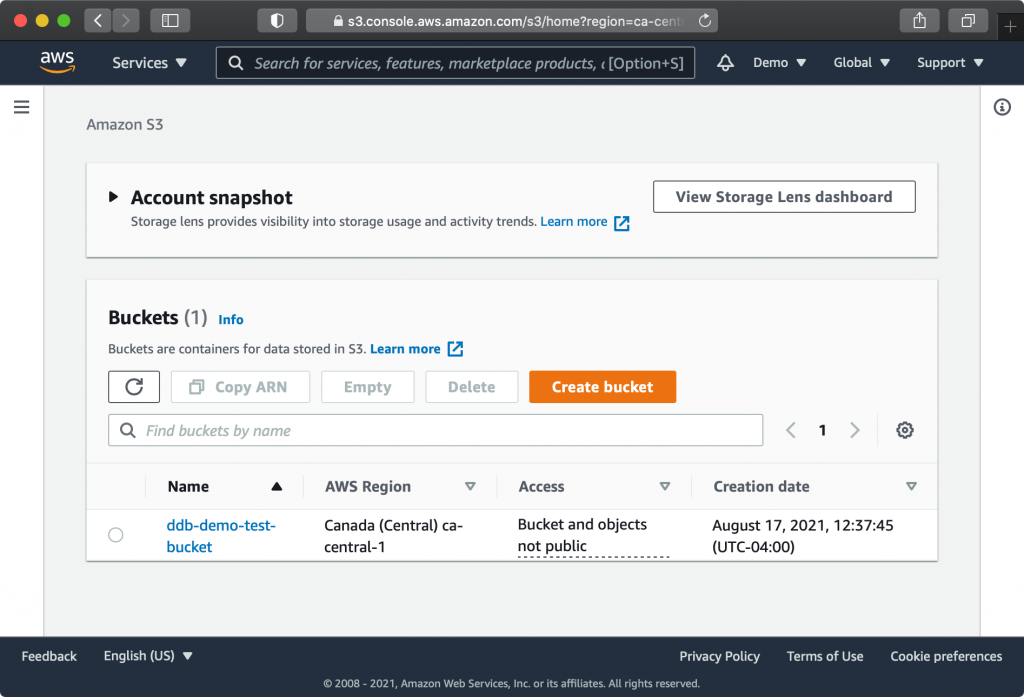
When you’re ready, click “Create Bucket”. You should now see your bucket in your “Buckets” list:
Click on the bucket name, then open the “Permissions” tab. Scroll down to the section: “Cross-origin resource sharing (CORS)”. If you plan to interact with your bucket through a web browser (including a web viewer), click “Edit” and paste the following CORS configuration:
[
    {
        "AllowedHeaders": [
            "*"
        ],
        "AllowedMethods": [
            "GET",
            "HEAD",
            "PUT"
        ],
        "AllowedOrigins": [
            "*"
        ],
        "ExposeHeaders": []
    }
]
Save your changes.
Configure IAM Policy & User
Now you need to configure a User and Policy so that you can authenticate to the bucket and interact with it through an API.
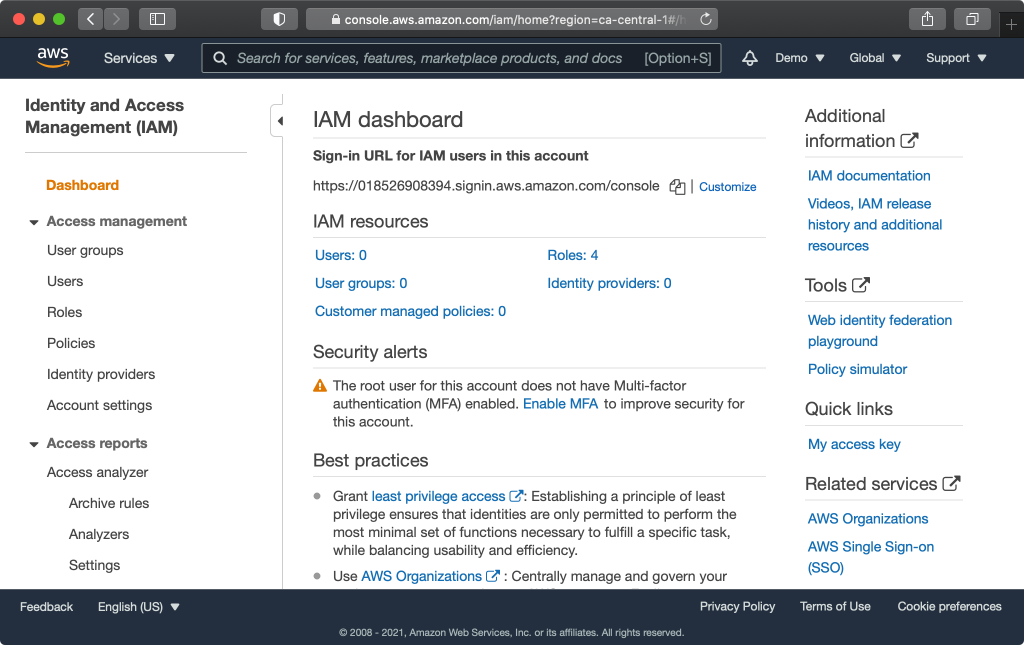
In AWS, users are managed through the Identity and Access Management (IAM) service. Use the search bar to navigate to the IAM service.
First, create a policy with the appropriate permissions. Click “Policies” in the menu at the left, then click “Create Policy”.
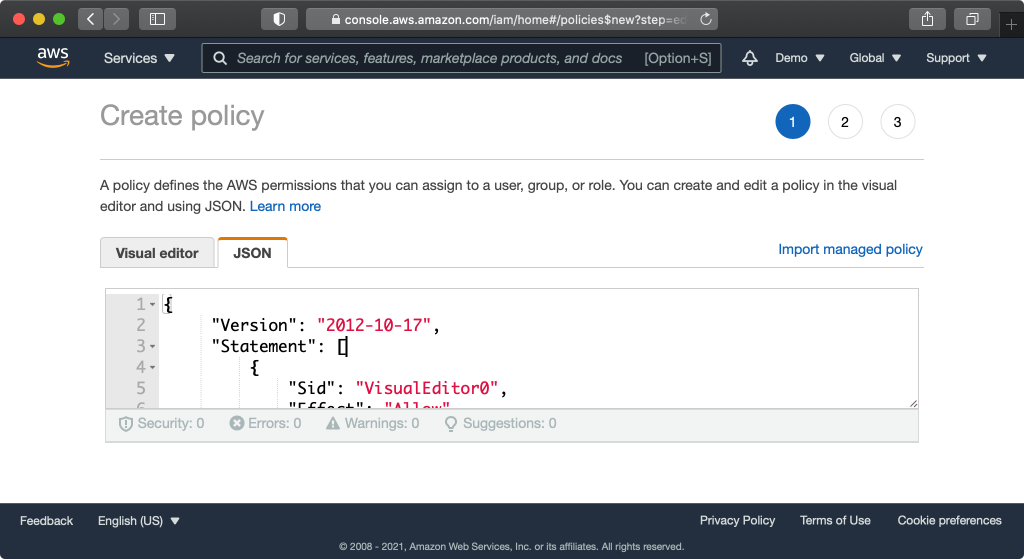
Select the JSON tab and replace the existing contents with the following. This policy grants 4 privileges. s3:PutObject (upload), s3:GetObject (download), s3:ListBucket (list bucket contents), and s3:DeleteObject. These privileges apply to the specific resource listed, in this case the bucket and its contents.
{
     "Version": "2012-10-17",
     "Statement": [
         {
             "Sid": "VisualEditor0",
             "Effect": "Allow",
             "Action": [
                 "s3:PutObject",
                 "s3:GetObject",
                 "s3:ListBucket",
                 "s3:DeleteObject"
             ],
             "Resource": [
                 "arn:aws:s3:::YOUR-BUCKET-NAME/*",
                 "arn:aws:s3:::YOUR-BUCKET-NAME"
             ]
         }
     ]
 }
Be sure to replace YOUR-BUCKET-NAME with the actual name of your bucket.
You may not need all of these privileges or you may need to add additional privileges for your use case, for example if you want the API user to be able to view and/or delete versions.
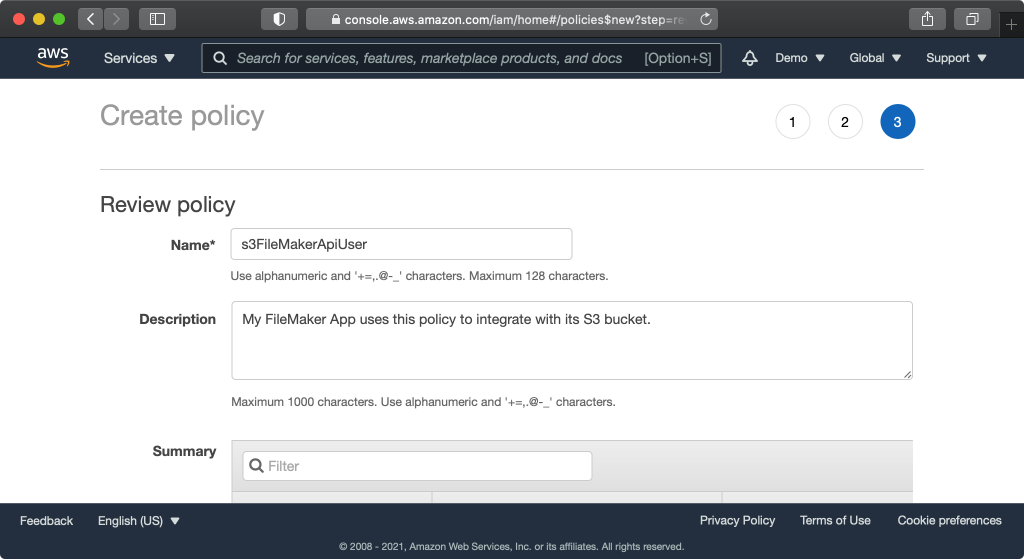
Click “Next: tags” then “Next: review”. Give your policy a name like “s3FileMakerApiUser” and add a description if you wish. Click “Create policy”.
Next, create a User. Click “Users” in the menu at the left, then click “Add users”.
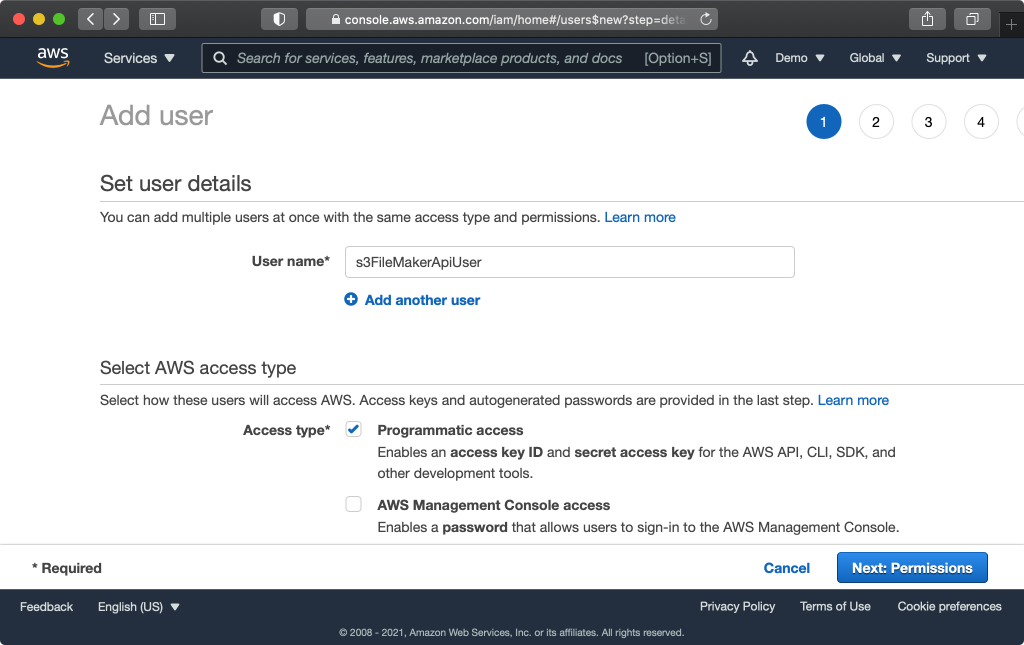
Input a user name like “s3FileMakerApiUser” and choose “Programmatic access” as the “Access type”. Click “Next: Permissions”
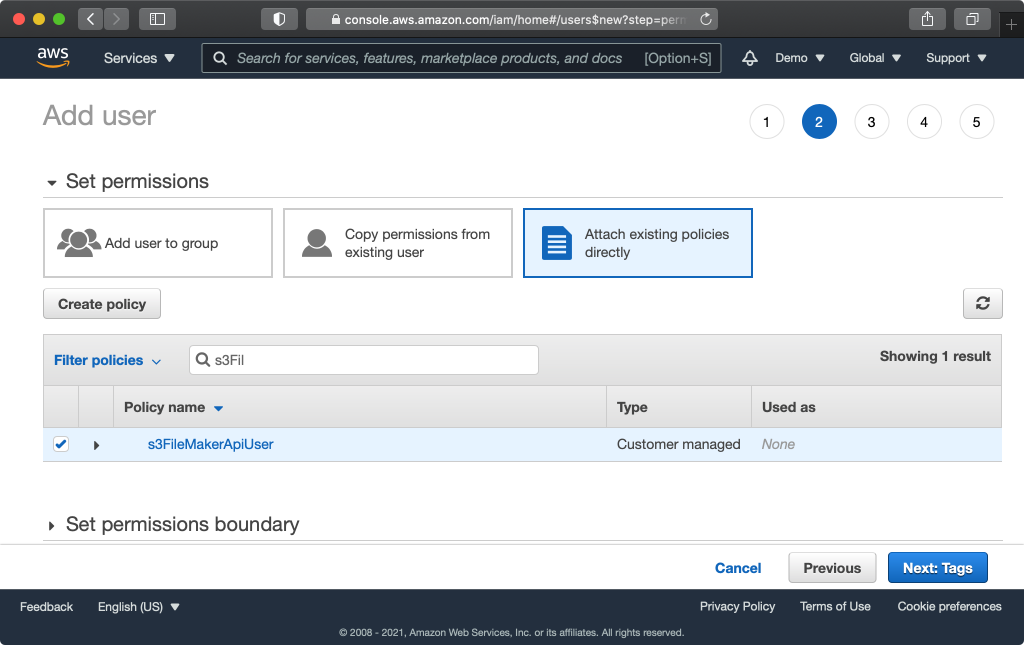
Click “Attach existing policies directly”. Find the policy you created earlier and select the box, then click “Next: Tags”, then “Next: Review”, and finally “Create user”.

Click “Show” to expose the Secret access key. The Access key ID and Secret access key will be required to connect to S3 from FileMaker. You will not be able to retrieve the secret key again, but you can generate a new one at any time.
You would generally store this information in a preferences table in your FileMaker app. If you do not have a preferences table, you could temporarily paste this information directly into “Set Variable” script steps, but be aware of the security risks. Most importantly, your API credentials will be exposed in plain text in any DDR or XML output of your FileMaker file.
Congratulations! Configuration on the AWS side is done.
The Presigned URL
This little guy does all the heavy lifting.
An AWS presigned URL is a URL for an AWS API call that includes a signature derived from the request details including the URL, method, headers, and credentials. The URL can only be used to run the specific request for which it was intended – if you try to change the URL, method, or headers, the signature will be invalid.
The presigned URL is especially useful when you want to allow someone to download an object, such as a user who you have authenticated on your website. You can generate a presigned URL to retrieve an object in S3, and you can make the URL valid for a window spanning anywhere from 1 second to 7 days. You can then incorporate this URL into a webpage, and the image will load just like any other resource URL (to an image file, for example).
You can also use a presigned URL for other actions, like uploading files to S3, deleting files, or getting object metadata.
Without the presigned URL, you would not be able to publish objects to a website without making the objects public or passing them through another web service, and you would not be able to create a service that allowed end-users to upload files directly to S3 without going through another web service.
The s3presignedUrl() FileMaker custom function
s3presignedUrl ( method ; bucket ; region ; theFilePath ; expireSeconds ; accessKey ; secretKey ; optionsObj )
Get the function and docs: quarfie / s3presignedUrl_FMFunction on GitHub
FileMaker Usage
Here are some example scripts for working with S3 in FileMaker:
Uploading a file from a container to S3
Set Variable [ $path ; "folder/thefilename.jpg" ]
Set Variable [ $url ; s3presignedUrl ( "PUT" ; $bucket ; $region ; $path ; 60 ; $access_key ; $secret_key ; "" ]
Set Variable [ $container ; Table::Container ]
Set Variable [ $contentType ; "image/jpeg" ]
Set Variable [ $curl ; "-X PUT -H " & Quote ( "Content-Type: " & $contentType) & " --data-binary @$container -D $responseHeaders" ]
Insert From URL [ Select ; With dialog: Off ; Target: $result ; $url ; Verify SSL Certificates ; cURL options: $curl ; Do not automatically encode URL ]
If [ PatternCount ( $responseHeaders ; "200 OK" ) ]
 //File was successfully uploaded
Else
 //Error
End If
NOTE: The above example includes a hard-coded Content-Type header (“image/jpeg”). You can automatically determine the content type (or “MIME type”) using a custom function like GetMIMEType ( fileNameOrExtension ). The Content-Type is important if you wish to render the file in a browser (including a web viewer), as it will be sent back as a header that the browser requires to display it. Without this information, the browser will simply download the file.
Download a file from S3 to a container field
Set Variable [ $path ; "folder/thefilename.jpg" ]
Set Variable [ $url ; s3presignedUrl ( "GET" ; $bucket ; $region ; $path ; 60 ; $access_key ; $secret_key ; "" ]
Set Variable [ $curl ; "--FM-return-container-variable -D $responseHeaders" ]
Insert From URL [ Select ; With dialog: Off ; Target: $result ; $url ; Verify SSL Certificates ; cURL options: $curl ; Do not automatically encode URL ]
If [ PatternCount ( $responseHeaders ; "200 OK" ) ]
 //File is in $result
 Set Field [ Table::Container ; $result ]
Else
 //Error
End If
View a file in a web viewer
This example assumes the file is an image file that can load into an image tag.
Let ([
   ~path = Table::path ;
   ~url = s3presignedUrl ( "GET" ; $bucket ; $region ; ~path ; 60*5 ; $accessKey ; $secretKey ; "" )
];
"data:text/html,<!DOCTYPE html><html><head></head><body style=\"margin:0px;\"><div style=\"width:100wv;height:100vh;\"><img style=\"max-width:100%;max-height:100%;margin-left:auto;margin-right:auto;display:block;\" src=\"" & ~url & "\"></div></body></html>"
)
Tip: Rather than using a calculation in a web viewer object directly, use the Set Web Viewer script step. This can be called OnRecordLoad or whenever the web viewer is exposed. This should solve refresh issues that you may encounter when resizing windows or modifying the underlying record.
Delete File Example
Set Variable [ $path ; "folder/thefilename.jpg" ]
Set Variable [ $url ; s3presignedUrl ( "DELETE" ; $bucket ; $region ; $path ; 60 ; $access_key ; $secret_key ; "" ]
Set Variable [ $curl ; "-X DELETE -D $responseHeaders" ]
Insert From URL [ Select ; With dialog: Off ; Target: $result ; $url ; Verify SSL Certificates ; cURL options: $curl ; Do not automatically encode URL ]
If [ PatternCount ( $responseHeaders ; "204 No Content" ) ]
 //File was successfully deleted or never existed to begin with
Else
 //Error
End If
Get Metadata about the object in S3 (Content-Type and File Size)
Set Variable [ $path ; "folder/thefilename.jpg" ]
Set Variable [ $url ; s3presignedUrl ( "HEAD" ; $bucket ; $region ; $path ; 60 ; $access_key ; $secret_key ; "" ]
Set Variable [ $curl ; "--head" ]
Insert From URL [ Select ; With dialog: Off ; Target: $result ; $url ; Verify SSL Certificates ; cURL options: $curl ; Do not automatically encode URL ]
Set Variable [ $responseCode ; Value: MiddleWords ( $result ; 3 ; 1 ) ]
If [ $responseCode = 200 ]
 //File exists and you can now parse out the headers Content-Type and Content-Length
Else
 //Error
End If
Taking it to the next level: eliminating container fields and building a great UI
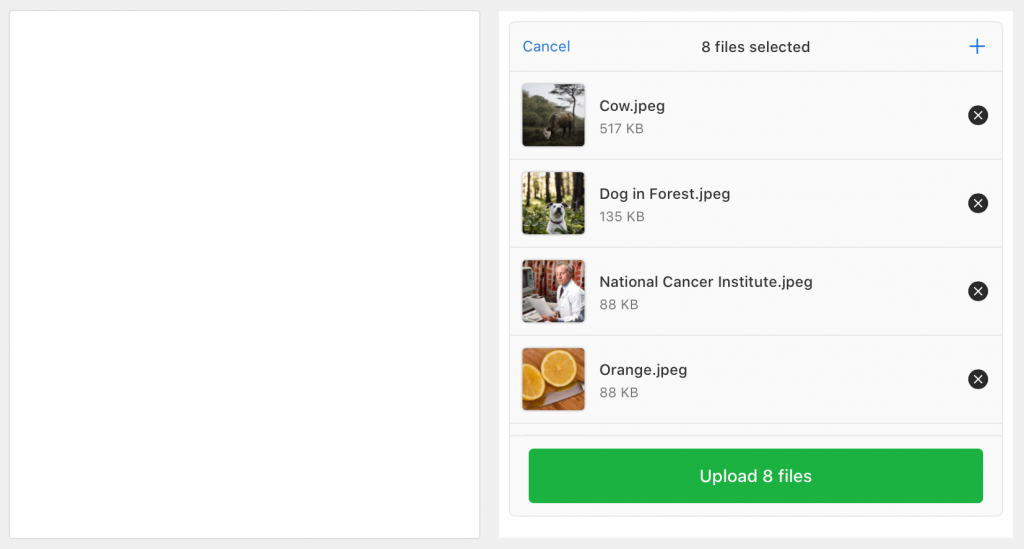
By adding a JavaScript-based uploader like Uppy, and taking advantage of FileMaker 19’s JavaScript integration features, you can completely eliminate the need for FileMaker containers!
The attached file demonstrates this capability and works in FileMaker Pro, Go, and WebDirect.

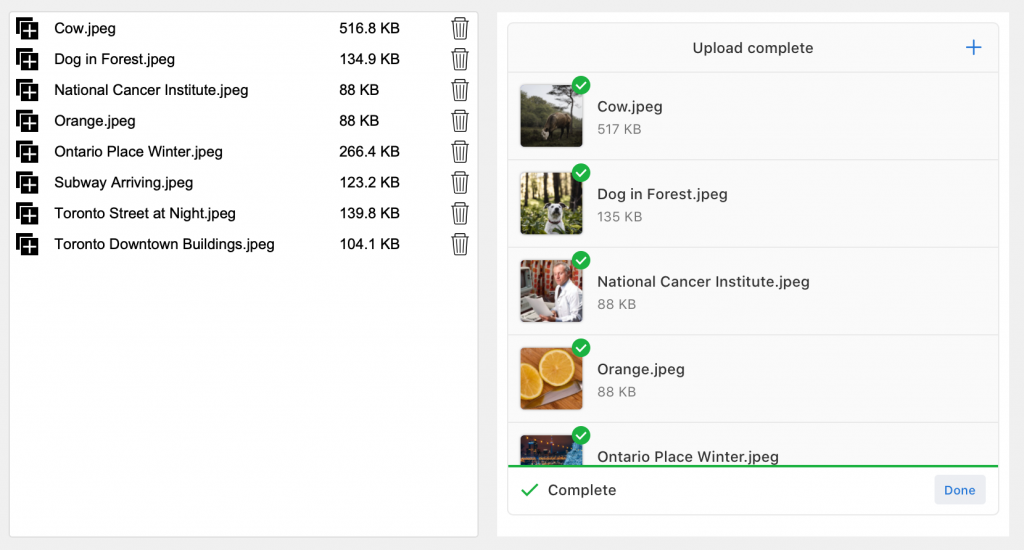

Similarly, when it comes time to display the file, conditional logic generates the appropriate html/css to display the file based on its type. If it cannot render the file type or the file type is unfamiliar, it will present an html page with a download link. When clicked, the file is downloaded to the user’s download folder.
Uppy can also be used on your website! When the user clicks “Upload”, use the Data API to run a script in FileMaker to create the corresponding record and generate the presigned URL, then send that back down to Uppy to complete the upload directly to S3.
The file is intended as a demonstration and not a starter file. I encourage you to build your own file in a way that is consistent with your own coding style.
NOTE: The demo file might not have the latest available version of the s3PresignedUrl() custom function. Be sure to check for the latest version from GitHub.
Closing Thoughts
I’m so glad you made it all the way to the bottom of this very long post! I am looking forward to hearing from you, especially if there is anything I could have done better! If your comment is not posted, please reach out to me, as I employ a very aggressive spam filter!
Updates
2022-02-03 – This article previously stated that AWS Availability Zones may exist under one roof. In fact, they are always separated by a “meaningful distance”. Various AWS resources describe the minimum distance as “1 mile” (1.6km) or “many kilometres”, and the maximum distance is consistently stated as 100 km (60 miles). eg: https://aws.amazon.com/about-aws/global-infrastructure/regions_az/
2024-09-21 – Added the note under the S3 Demo download button to check for the latest version of s3PresignedURL from GitHub. The older versions of the custom function does not work with newer AWS regions that only support S3 dot region endpoint structure and not the older dash region endpoint structure.
Hi Jason,
Thank you so much for this. I have been trying to get this right and the s3presignedURL function works nicely.
Regards
Nathan
Hi Jason,
Great, this is what I was looking for!
Thank you so much.
Hans Rein
This looks great… I’m just looking into containers and speeding up backups etc… We are thinking of using Wasabi as it is much cheaper than AWS… I tried adapting your scripts etc to work with Wasabi but I fear my lack of knowledge may be hampering me…Have you got any tips as to which bits will need to be changed to get it working?
I just had a look at the Wasabi documentation and committed a change to the s3presignedURL() function to make it more compatible, so make sure you’re using the latest version from https://github.com/quarfie/s3presignedUrl_FMFunction
Note that for third party S3 compatible services you have to pass an object in the last parameter of the function, which would look like:
{“host”:”https://s3.us-east-2.wasabisys.com”}
I am curios if you were able to get this working with Wasabi and how your experience with Wasabi has been?
Superb! I’ve been looking for a way to offload container storage to a 3rd party service for a while, and this is great – exactly what I wanted, and very well explained and documented.
This is a game changer! Really like that it is FileMaker interacting directly with S3 and no dependencies on 3rd party services. More secure and reliable. Also you documented everything very well. Am currently dealing with a database with thousands of external mostly acrobat files (and growing) and am moving to your solution. Thank you for this!
This is a great blog and Custom Function! 🙂
One thing I have been trying to work with it though is adding the ‘public-read’ ACL to the uploaded file, and haven’t been able to work it out.
As far as I know, it would need the ‘x-amz-acl=public-read’ parameter added to the query that gets signed, and also a header sent with the PUT request when uploaded which would be:
‘x-amz-acl’: ‘public-read’
Any ideas on how to make this work, or if it can be added as a parameter to the Custom Function? That would be wonderful 🙂
My recommendation from a security standpoint is to have your entire bucket be either public or private (block all public access set to ON), so there is never any question about the status of individual objects through ACLs. I’m curious about the use-case where using ACLs would be required or advantageous.
To hack the custom function to make this work, you’d add it as the first key/value pair in the ~query variable. It needs to be first because they need to be sorted alphabetically for the purposes of the signature.
If I were to add this capability to the custom function, I would probably add an additional element to the OptionsObj parameter that would allow you to pass an array of additional query objects. The function would then need logic to sort the query parameters.
This might be a silly question, but we show thumbnail images on list views. Would it be possible to use images stored in S3 in this use case? Seems like it is more for single images.
Any insights would be greatly appreciated.
Web viewers work in list view but I have not tried it. I’m unsure about the loading characteristics when scrolling. You may have to do something sneaky to avoid refresh issues… you won’t want to reference the s3PresignedUrl() directly in a web viewer calc because the function includes the current timestamp, which causes a refresh every time you give or take focus from the web viewer. You’d probably want to create a new custom function that references a timestamp in a global variable so it doesn’t change every second. This means you may need to give the resigned URL a longer period of validity (as long as you want people to be able to scroll and still load images without doing some scripted action that would reset the global timestamp).
Maybe 4 years late but I thought I share my experience with webV + list view. Years ago before 2018 I had a project which required me to implement that. It wasn’t a heavy webpage to render (no pictures). Just static text with some pretty colour format in html (pure text stored internally) only. Result is there were occasional rows with just blank webV and nothing in it. Refreshing doesn’t really help. I vaguely remember I contacted Claris support and the response I got is to avoid that kind of design/setup. It perhaps consumes more resources than expected.
Love the custom function!
We’ve been using pre-signed URLs with locked down S3 buckets for a while now, but generating them with JavaScript or Python. The custom function makes for a nice all-in-one solution with fewer external dependencies.
Thank you very much! It works awesome and very clear instructions
Just a question: is there a chance to get in FileMaker a list of files contained in a S3 bucket ?
If you use the s3PresignedUrl function, set the method to GET, and specify “/” as the path, then you will get a list of objects returned in XML format, up to 1000 items.
For more specificity, you need to use a query string, and the custom function currently does not support that, for 2 reasons that I can think of just now… one is that it will encode the characters “?” and “=” as if they were part of a filename, and second is that they need to be sorted before they can be incorporated into the string for signing. If I were to build this functionality, my approach would be to add support within the optionsObj key to pass a query string, possibly as an array of key/value pairs.
Congrats. It’s a very well done tutorial and the demo is excellent.
Hi – just wondering if you could help me getting the signature to work on WebDirect when there’s spaces in the filename?
I’ve tried modifying the CF at the same places you do the substitutions for the “/” chapter, but no joy….
You are a beast! This is an amazing walkthrough for getting integrated to FileMaker. I also love your ideas for UI improvement. I’m so glad I came across this article. Seriously a godsend.
We have a web viewer where we display a gallery of 12 images (approx 2MB each) all on one screen. Would using public storage be faster than using GET to display the images? Or is there no difference in speed?
Also, what are you thoughts on security of public storage if I am using multiple UUIDs to create sub-directories and file names?
(example: https://my-bucket.s3-us-west-1.amazonaws.com/DAF2CD24-1501-451F-8FE6-7A002AC8903E/0A3F4CDF-7619-4BF4-A26C-17907FA0E33B/44A4DDEA-4B52-46BB-AB74-06773C4137D6.png)
Whether a bucket allows public access or not does not change the fact that you obtain the files using an HTTP GET request. The only difference would be that you don’t need to sign the request with your API keys. Your browser uses the GET method pretty much every time it obtains anything… images, javascript files, css, etc. I would not expect there to be any performance difference associated with having a public vs private bucket, although with a public bucket, you may be able to use a CDN to bring the data closer to users around the world. You might consider generating thumbnails to display in your gallery view, if you want to improve performance or reduce costs.
Thanks for the study base, I’ll probably have to do something with BlackBlaze’s B2 in case I post something for the necessary changes. Good job!
The s3presignedUrl() method also works correctly with backBlaze.com. You have to put the bucket name in front otherwise there will be problems with the signature calculation.
*
set variable [$host; value : JSONSetElement ( “” ; “host” ; $bucket & “.” & GetPreference ( “S3_host” ) ; JSONString )]
*
Thanks for your help.
Like Sky Willmott, I am struggling to make pictures public. I can manually change the file’s permission using the console interface. But I can’t seem to automate it. This is what I tried:
# url modification
Set Variable [ $url; Substitute( $url; “?”; “?x-amz-acl=public-read&”) ]
# curl modification via $acl
Set Variable [ $acl; ” -H ” & Quote(“x-amz-acl: public-read”) ]
Set Variable [ $curl; “-X PUT -H ” & Quote ( “Content-Type: ” & $contentType) & $acl & ” –data-binary @$container -D $responseHeaders” ]
The response header is 403 Forbidden. If I remove these modifications, the automated upload works, without public read access.
The IAM policy does include permission management PutObjectAcl.
Regarding the use case comments, my understanding is there is not a bucket setting for public read access to everything within or for all newly uploaded files. I understand the bucket settings to be for allowing for public read assignment, not for making public read assignment.
@Alan Smith, the reason why none of the options you’ve described will work is because they will not be incorporated into the signature. The whole purpose of signing the URL is to ensure it can only be used for the purpose for which it was created, so you can transmit it to an outside user who you want to be able to perform a specific action, but don’t want them to be able to manipulate it to perform other actions.
Therefore, the function would need to be modified to allow you to add an option like this.
If you want your entire bucket to have public read access, then add a bucket policy like this under the permissions tab:
{
“Version”: “2012-10-17”,
“Statement”: [
{
“Effect”: “Allow”,
“Principal”: “*”,
“Action”: “s3:GetObject”,
“Resource”: “arn:aws:s3:::bucket-name/*”
}
]
}
This will take precedence over individual ACLs, so if an object’s ACL is set to private, the above bucket policy would allow public access anyway.
That bucket policy works perfectly! Thank you Jason!
Just want to post my appreciate on this post. I am not good enough to work through the authentication (or/and resigned URL bits) to make this work and your demo + walk through really helps.
Just a wild idea. Ever have a chance to make Google Cloud Storage work the same as this S3 demo? I also looked in to that. Not completely done trying yet. Trying on JWT bit at the moment.